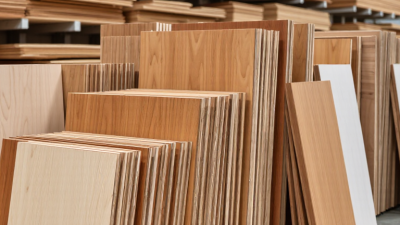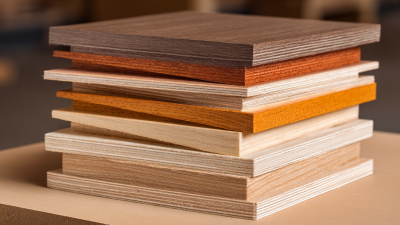
Cabinet plywood can look convincing under showroom lights. The real test comes later, when a hinge is screwed into an edge or a shelf carries a stack of dishes. Veneer quality, core construction, thickness, and moisture resistance all affect how a cabinet performs. Choosing well means looking beyond a smooth face.
Carpenter and construction educator Gary Katz is known for practical, jobsite-focused guidance. No verified quotation from him was provided for this article, so I won’t invent one. Instead, this guide uses a clear editorial principle: “Choose the panel for its job, not just its label.” It is a reminder, not a direct quotation. Check the panel grade, inspect the plies at a cut edge, and compare the material with the cabinet’s location and expected use.
Small details matter. A rough core may complicate a clean edge. A panel that works for a dry pantry may not suit a humid laundry room. And the cheapest sheet can become expensive after waste or repairs. Still, specifications do not tell the whole story; handling and installation matter too. A little uncertainty remains.
These seven tips will help you compare cabinet plywood with a more experienced eye. They cover grades, veneers, core types, thickness, moisture exposure, and value, so your choice fits the project—not just the price tag.

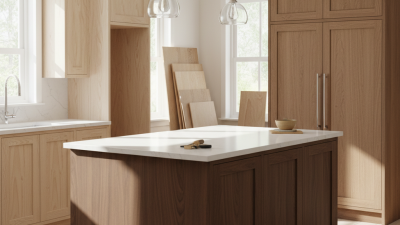
Before comparing cabinet plywood, decide where the cabinet will sit and what it must hold. A kitchen sink base faces occasional leaks and damp air, while a bedroom cabinet usually stays in a steadier environment. Moisture-resistant plywood may suit a humid room, but it is not waterproof; standing water can still damage edges and joints. For shelves holding heavy cookware, check panel thickness, support spacing, and the plywood core, not just the smooth face veneer.
Think about daily wear, too. A child’s low cabinet may need a durable finish and edges that resist knocks. A display cabinet may prioritize an even grain and clean appearance instead. Open the product information and confirm its intended interior use, thickness, and surface grade. If the sheet will be painted, a flawless decorative veneer may add cost without improving performance. That can be wasteful. I would also leave room for uncertainty: real kitchens get steamy, and installation details affect how well panels last. Seal exposed edges, avoid trapping moisture, and choose a panel suited to the cabinet’s actual location rather than relying on a broad label such as “cabinet grade.”
Compare grades before comparing prices.
Tip: Match the face grade to the finish you want. A-grade faces are typically smoother and need less patching, while lower grades may show knots or repairs.
Tip: Inspect both sides, even if only one will be visible; a rough back can complicate installation.
Look closely. Small defects matter.
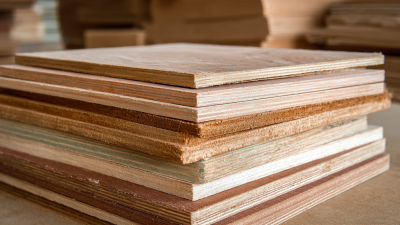
Core construction affects strength and stability.
Tip: Check the panel edge for voids, gaps, or uneven plies. A balanced veneer core is a common cabinet choice, while a composite core can offer a smoother, more consistent surface.
Tip: Consider where the cabinet will sit. Moisture-resistant construction may help in humid rooms, but it does not make plywood waterproof.
I learned that the hard way on a poorly ventilated project.
Veneer quality shapes the finished appearance.
Tip: Look for an even grain pattern and consistent color across the sheet.
Tip: Ask whether the face veneer is rotary-cut or sliced; their grain patterns can look quite different on broad doors.
Tip: Bring a sample home and view it under your room’s lighting.
Store lighting can be misleading.
Also check thickness and flatness before buying, since warped sheets can make doors and drawers harder to align.
Thickness affects stiffness, screw holding, and how cabinet parts meet. For many cabinet boxes, 3/4-inch panels are a dependable starting point, especially for long sides and loaded shelves. Yet nominal thickness can differ slightly from measured thickness, so check the sheet and hardware requirements before cutting. A 1/2-inch panel may work for a small, well-supported cabinet, but it can flex across a wide span. Test the fit. A shelf carrying stacks of dishes needs more support than a short drawer partition.
Panel construction matters just as much. Plywood with multiple, evenly layered veneers tends to stay flatter than panels with uneven cores. Check the edge. Look for gaps, overlapping voids, or loose layers; these can weaken screw locations and show through thin finishes. A stable core and balanced face and back veneers help reduce cupping as humidity changes. “Moisture resistant” does not mean waterproof. Kitchens still need sealed edges, especially near sinks. It is tempting to choose the thickest sheet and move on, but that is not always the better choice. Heavy panels add weight and can complicate hinges or installation. Match thickness to span, load, joinery, and cabinet support.
| Tip | What to Check | Practical Guidance | Why It Matters |
|---|---|---|---|
| 1. Choose thickness for the cabinet part | Panel thickness and intended use | For many cabinet cases and shelves, 3/4-inch (about 19 mm) plywood is a common choice. Cabinet backs are often thinner, such as 1/4-inch (about 6 mm), when set into a groove; a thicker back may be used when it contributes to rigidity or supports attachments. | Thickness affects stiffness, weight, usable space, and how securely panels can be joined. Follow the cabinet design and hardware requirements. |
| 2. Account for shelf span and load | Shelf length, depth, and expected weight | Use 3/4-inch plywood as a starting point for general-purpose shelves. Long spans or heavy loads may need a shorter span, a front edge stiffener, a center support, or a thicker panel. | Even a sound plywood shelf can sag over time when its span and load are too great. |
| 3. Inspect the panel construction | Core type, plies, and visible voids | Look for a stable, well-bonded core with reasonably uniform layers and few gaps or voids at the edges. Veneer-core plywood is commonly used for cabinet boxes; other core constructions may suit specific finishing or machining needs. | Core quality influences screw holding, edge strength, flatness, and the risk of defects appearing during cutting. |
| 4. Match the face grade to the finish | Surface defects, veneer quality, and both faces | Choose a smoother, higher-quality face for transparent finishes or visible cabinet fronts. A less refined face may be suitable for concealed surfaces, provided it is sound and appropriate for the planned coating. | Face grade affects appearance and the amount of filling, sanding, or patching required. |
| 5. Verify the actual thickness | Measured thickness, not just the nominal label | Measure the sheet with a caliper or reliable thickness gauge, especially when fitting panels into grooves or using pre-sized hardware. Plywood thickness can vary by product and manufacturing tolerance. | A small difference can affect dado fit, cabinet dimensions, and the alignment of doors, shelves, and joinery. |
| 6. Check moisture and intended environment | Bond classification and installation conditions | For kitchens and other areas where humidity may fluctuate, select panels with a bond and construction suitable for the intended interior use, and seal exposed edges and surfaces as appropriate. Use exterior-rated panels only when the project calls for that level of exposure resistance. | Moisture can contribute to swelling, warping, or bond failure. Water-resistant glue does not make a panel waterproof. |
| 7. Plan for edges, fasteners, and finish | Edge treatment, screw placement, and coating compatibility | Allow for edge banding or solid-wood edging where edges will be visible. Keep fasteners appropriately sized and positioned, and test the intended stain, paint, or clear finish on an offcut. | Plywood edges expose the core, and veneer surfaces may absorb finishes differently from solid wood. |
Before choosing cabinet plywood, inspect the full sheet under bright, angled light. Look for open knots, splits, bubbles, and patches that feel loose at the edges. Check both faces; a clean front can hide damage on the back. Small surface marks may be harmless, but deep voids near a cut edge can weaken a door or shelf. Run your fingers over suspicious areas. You may miss defects when you rush.
Flatness matters during assembly. Lay the panel on a level floor or a known-flat bench, then sight along its length. A slight bow can often be managed in a small part, but twisting across the sheet can make cabinet doors difficult to align. Press gently on opposite corners and watch for rocking. Do not rely on a quick glance alone. Even experienced buyers sometimes overlook a subtle twist.
Check dimensions with a tape measure at several points, including both edges and the center. Compare thickness, too; variation can leave uneven cabinet faces or awkward joints. A single measurement is not enough. If several sheets are needed, stack them and compare their edges. A little variation may be workable, depending on the project and hardware, but confirm your tolerances before cutting. If a panel feels questionable, pause and inspect it again rather than assuming the saw will solve the problem.
Cabinet plywood can look identical on a showroom rack, yet vary in core quality, veneer, and emissions. Compare suppliers using the same written specification: thickness, face grade, core type, and intended finish. Ask for the paperwork. Request current product documentation, not just a general company certificate. Check whether any emissions or sourcing certification covers the exact panel being quoted, and confirm its issuer and validity.
Pricing deserves a closer look than the per-sheet number. Request an itemized quote that shows sheet size, grade, delivery fees, minimum order, and possible surcharges. Then compare equivalent products. A cheaper sheet may have more core voids or uneven thickness, creating extra sanding and waste. Samples matter. Inspect a cut edge under good light, and check whether the face veneer feels consistent across the panel.
Supplier service is part of the comparison, too. Ask how damaged sheets are handled and whether production batches can be traced to their documentation. Clear answers are useful; vague promises are not. Still, even a careful checklist can miss a mismatch between a sample and a full shipment. Record the quoted specifications and inspect delivered sheets before cutting. That extra check takes time, but can prevent a costly surprise later.

Signup our newsletter to get update information, promotion or insight.