10 Essential Tips for Working with Baltic Birch in Your Projects
Baltic birch is a favorite among woodworkers and DIY enthusiasts alike. This high-quality plywood is known for its strength and stability, making it ideal for various projects. Whether you are crafting furniture, building cabinets, or designing intricate models, Baltic birch offers unique advantages. It is essential to understand its characteristics to maximize its potential.
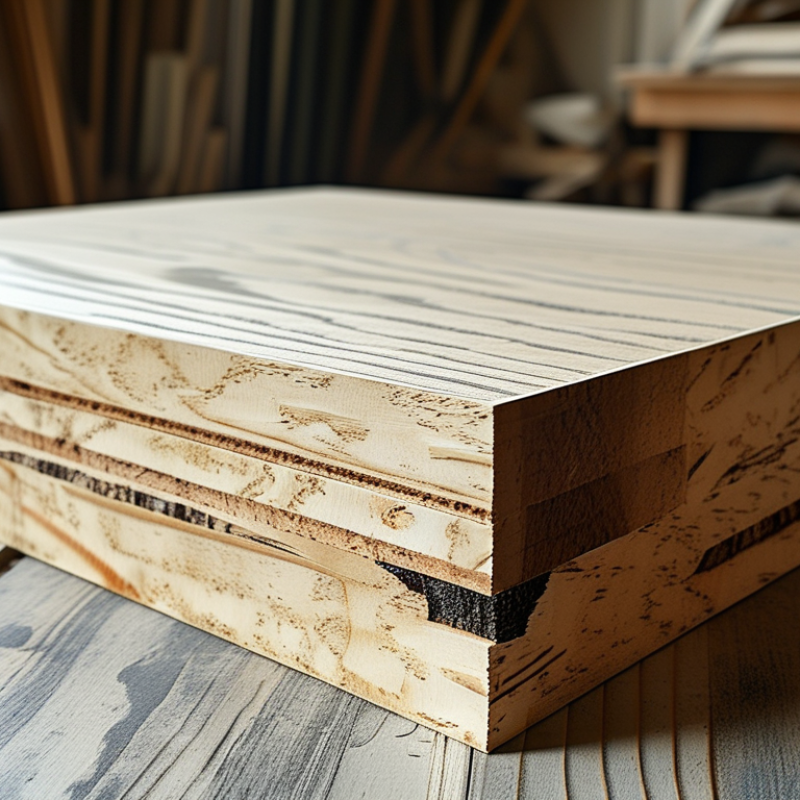
When working with Baltic birch, keep in mind its layered construction. The multiple plywood layers provide durability, but they can be tricky when cutting or shaping. While it is forgiving, improper techniques can lead to splintering. Knowing how to handle this material is key. Furthermore, take time to choose the right tools for the job to ensure a smooth finish.
Also, Baltic birch can sometimes be pricey. This cost may lead some to cut corners or rush the process. This approach can hinder the project's end quality. However, investing time and care in working with this plywood will pay off significantly. Ultimately, mastering the use of Baltic birch can elevate your woodworking skills and result in impressive creations.
Understanding Baltic Birch: Characteristics and Benefits
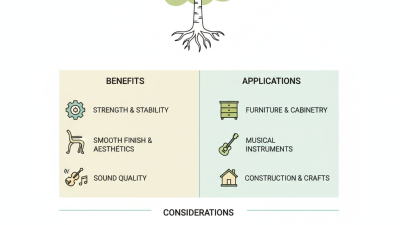
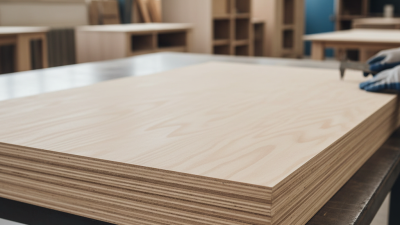
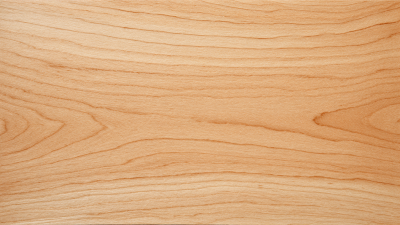
Baltic Birch is renowned for its durability and versatility in various projects. This plywood is made from multiple layers of birch veneer, providing exceptional strength. The fine grain and light color make it aesthetically pleasing, suitable for both visible and hidden applications.
One of the major characteristics of Baltic Birch is its stable structure. It resists warping and cracking better than many other types of plywood. This stability is essential for furniture making and cabinetry. However, it's worth noting that the surface may show imperfections or knots, which can impact the final appearance. Sanding may be required for a smooth finish, but this can also reveal the wood's unique texture.
Working with Baltic Birch offers significant benefits, such as a smooth surface for painting or staining. Its ability to hold screws well makes it a favorite among builders. Yet, the density can make it harder to cut and shape, requiring sharp tools and careful handling. Understanding these characteristics allows for better planning in projects, but it also means facing challenges with patience and attentiveness.
Understanding the Benefits of Baltic Birch in Projects
Selecting the Right Grade of Baltic Birch for Your Project
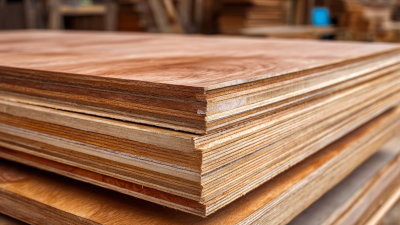
When selecting the right grade of Baltic Birch for your project, it’s crucial to understand the various options available. Baltic Birch comes in multiple grades, such as B/BB, C, and A. Each grade signifies its surface quality and the amount of visible imperfections. Grades B/BB are often preferred for furniture, offering a smooth finish with minimal defects. On the other hand, lower grades like C have more knots and blemishes, which can affect aesthetics.
Another important factor is the intended use of your project. If durability and strength are priorities, higher grades will generally offer better stability. However, using a lower grade for hidden components can save costs without compromising overall integrity. Keep in mind that even top grades may have slight variations due to natural wood properties.
Taking these nuances into account will help you make informed choices for your specific needs. Remember, versatility is one of Baltic Birch's strengths, but not every grade suits every application. Consider experimenting to see how different grades work for your projects.
Essential Tools and Techniques for Working with Baltic Birch
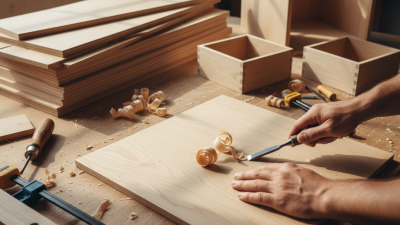
When working with Baltic Birch, it's important to have the right tools. A sharp table saw will provide clean, precise cuts. A good-quality plywood blade can minimize splintering. Also, invest in a reliable orbital sander. This tool helps achieve a smooth finish. Remember to use clamps to secure your pieces while cutting or assembling. Stability is crucial for accuracy.
Technique matters as much as tools. Always measure twice before cutting. This can save you from costly mistakes. Pre-drilling holes prevents splitting, especially near edges. When gluing pieces together, apply enough pressure. This ensures a strong bond. It's wise to work in a well-ventilated area. Dust from Baltic Birch can be irritating. Lastly, take your time. Rushing can lead to errors and frustration. Celebrate small victories, but learn from the imperfections too.
Finishing and Sealing Options for Baltic Birch Projects
When working with Baltic Birch, selecting the right finishing and sealing options is critical. This plywood has a unique grain pattern that can enhance the aesthetic appeal of your project. However, it also requires proper treatment to protect it from damage and moisture. Water-based finishes are a popular choice, offering clarity and durability while minimizing the appearance of the wood grain.
Another effective option is oil-based finishes, which can deepen the color of the wood. These finishes provide a rich, warm look but can take longer to dry. Be aware that oil-based finishes often emit stronger fumes. Therefore, ensuring proper ventilation during application is vital.
Sealing Baltic Birch can be tricky. You must test finishes on scrap pieces first. Some finishes may raise the wood grain, resulting in an undesirable texture. Experimenting with different sealers on small samples can lead to satisfying results. It’s important to remember that imperfections can arise, and each project may require adjustments along the way. Embrace the learning process for the best outcome.
Common Mistakes to Avoid When Working with Baltic Birch
When working with Baltic Birch, avoiding common mistakes is crucial for achieving excellent results. One frequent error is failing to account for the wood's unique grain and layering. Baltic Birch has multiple plies, which can affect how it cuts and shapes. Not recognizing the grain direction may lead to splintering or unpredictable results.
Another mistake is using inappropriate adhesives or finishes. Many users choose quick-drying options, but these can react poorly with Baltic Birch. According to the Wood Component Manufacturers Association, improper adhesives can lead to joint failures in 15-20% of cases. It's essential to select products made for high-quality hardwoods to ensure longevity and durability.
Finally, neglecting proper tools can hinder project outcomes. Baltic Birch's density requires sharp blades and suitable machinery. Dull tools can cause tearing and require more effort, leading to poor finishes. In fact, research indicates that using the right tools helps reduce project errors by up to 30%. Paying attention to these details can significantly enhance your experience with Baltic Birch.
10 Essential Tips for Working with Baltic Birch in Your Projects - Common Mistakes to Avoid When Working with Baltic Birch
| Tip Number |
Tip Description |
Common Mistakes |
| 1 |
Choose the right thickness for your project |
Using a thickness that is too thin for structural applications |
| 2 |
Use proper cutting tools |
Not using sharp blades which can result in splintering |
| 3 |
Seal edges to prevent moisture entry |
Failing to seal edges, leading to potential warping |
| 4 |
Sand surfaces before finishing |
Skipping sanding, which affects finish adherence |
| 5 |
Consider the grain direction when cutting |
Not accounting for grain direction, resulting in uneven cuts |
| 6 |
Use clamps when glueing |
Neglecting to clamp pieces together, causing misalignment |
| 7 |
Select appropriate adhesives |
Using the wrong glue which may not bond effectively |
| 8 |
Avoid excessive moisture exposure |
Not protecting from moisture leading to deterioration |
| 9 |
Pre-drill holes for screws |
Omitting pre-drilling, which can cause splitting |
| 10 |
Finish with protection for longevity |
Skipping finishing step, reducing durability |